The Best, Easiest Homemade Cinnamon Roll Pull Apart Ever!

by 👩‍🍳 Cooking With a Southern Vibe in Music City USA 👩‍🍳, February 09, 2022


There is nothing better than a pan of cinnamon rolls hot from the oven.  There is also nothing that is more of a pain in the patootie to make from scratch than a pan of cinnamon rolls.

These yummy pull aparts are a variation of the famous monkey bread that has been around for years.  It was always baked in a bundt or angel food pan and it was really difficult to get cooked in the center without having the edges burn.  I had many doughy centers in the past with those cinnamon pull aparts and knew there had to be a better way.

Well there is!  Forget the bundt pan forget the angel food pan and bake them in a 9x13 pan.  Pure genius. These are so easy, so gooey, so good, grab the kids, have them help and you will have a pan of rolls to put in the fridge overnight to bake in the morning.

Ingredients:

24 Rhodes White Dinner Rolls, dough thawed to room temperature
1-1/4 cups brown sugar
1.5 sticks butter, melted
1.5 Tbsp cinnamon

 Icing:

Sift powdered sugar, stir in cream, and vanilla, then drizzle over pan of inverted hot rolls.

 1 cup powdered sugar
2 Tbsp heavy cream
1 tsp vanilla

Steps:

Cut each roll in half with a pair of kitchen shears. Combine brown sugar and cinnamon in a bowl. If the rolls are still partially frozen I've found they're easier to cut.

Roll each roll piece first in butter and then in cinnamon sugar. Place pieces, touching,  in a 9x 13 pan sprayed with nonstick spray. Just put remainder of the pieces on top to form an additional layer.  Pour remaining butter and sugar over the top of the rolls. Cover with sprayed plastic wrap.

Let rise for 30 minutes.  I don't do this, I put in the oven overnight to bake the next morning.


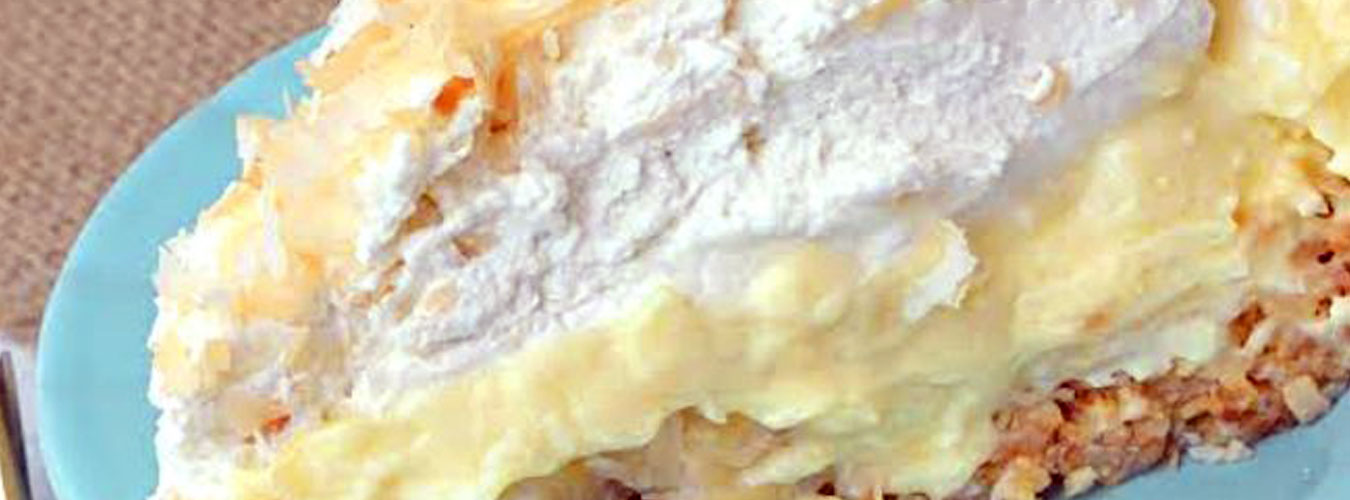
Lawry's Famous Coconut Banana Cream Pie

by 👩‍🍳 Cooking With a Southern Vibe in Music City USA 👩‍🍳, February 07, 2022

This famous recipe has 685,000+ views on Jan CAN Cook, so I thought it should be revisited.  It's a wonderful recipe that I first posted in 2009.  Here it is once again in it's entirety.

Heads up coconut lovers, this pie is amazing, totally decadent, and the coconut crust is absolutely awesome.  The crust takes it from ordinary to sublime.

Back in August of 2002, I emailed the L.A. Food Times regarding a recipe that I had gotten from their S.O.S. site and lost.  We made it several times and it was one of those special to-die-for recipes, so I was not a happy camper when I misplaced the recipe.

After writing to them, they reposted the recipe for me in their food column, I came across it again today and wanted to put it on Jan CAN Cook before I lost it again.  If you want a truly wonderful dessert, forget about the calories and make this.  It’s really special.

~ jan

DEAR SOS: About five or six years ago you printed a recipe for Lawry's Coconut Pie. It had a coconut crust and was to die for. 

JAN 

DEAR JAN: This is a great pie for those who fail at making pie crusts. This crust is really simple, consisting of melted butter and coconut pressed into a pie plate. 

Lawry's Coconut Banana Cream Pie 


Active Work Time: 20 minutes * Total Preparation Time: 30 minutes plus 2 hours chilling 

COCONUT PIE SHELL 

1/2 cup (1 stick) butter, plus more for pie plate 
3 cups sweetened flake coconut 

Lightly butter a 9-inch pie plate and set aside. 

Melt the 1/2 cup butter in a large skillet over medium heat and brown the coconut flakes, stirring constantly, about 5 minutes. They should be golden brown. Press the coconut firmly and evenly in the pan to form a shell. Chill the crust 30 minutes before filling. 

PIE FILLING 

4 egg yolks 

3/4 cup sugar, divided 

3 tablespoons cornstarch 

1/4 teaspoon salt 

1/4 cup flour 

3 cups half-and-half, divided 

Yellow food coloring 

2 teaspoons vanilla extract 

2 bananas 

1 cup whipping cream 

1 tablespoon powdered sugar 

Combine the egg yolks, 1/4 cup of the sugar, the cornstarch, salt and flour in a small bowl. Gradually add 1 cup of the half-and-half. 

Combine the remaining 2 cups half-and-half and 1/2 cup of the sugar in a 3-quart saucepan and bring just to boil over medium heat. Add the egg mixture and cook and stir until the mixture returns to a boil and thickens, about 1 minute. 

Remove from the heat. Stir in 2 drops of food coloring and the vanilla. Cover the surface with plastic wrap to prevent a skin from forming. Let cool. 

Slice the bananas into the pie shell. Pour the filling into the shell. 

Whip the cream with the powdered sugar until stiff. Spoon in dollops or pipe with a pastry bag around the edge of the pie. Chill 2 hours before slicing. 

6 to 8 servings. Each of 8 servings: 563 calories; 427 mg sodium; 182 mg cholesterol; 39 grams fat; 26 grams saturated fat; 50 grams carbohydrates; 6 grams protein; 1.62 grams fiber.

Update:  So many of you have found your way to this recipe via Pinterest, I appreciate all of the Pins, and hope you all enjoy this incredible pie.  I've received a few emails from people saying it was hard to cut through the crust, the only thing I can think of is that perhaps you are pressing the coconut into the pie pan, too firmly.  The majority of people seem to have no trouble with this, so I hope bit of information helps others who are going to bake this wonderful pie.  The response to it has been so positive, this is truly a one of a kind recipe.


#bananapie #coconutpie #coconutcreampie #bananapie #bananacreampie #yummydessert #awardwinningpie #pie #food #dessert #foodporn #homemade #foodie #baking #yummy #pies #pastry #instafood #delicious  #piesusu #foodstagram #bakery #chocolate #love #sweet  #foodblogger #tart #desserts #creampie #instagood #cooking  

World Famous Donatelli's Meat Sauce

by 👩‍🍳 Cooking With a Southern Vibe in Music City USA 👩‍🍳, February 07, 2022


 Arriving at Donatelli’s in White Bear Lake, patrons are greeted by 41 years of rich history. You can see it on the walls, decorated with images of the Pink Panther (or the Italian Panther as he is referred to at Donatelli’s), on the faces on the longtime staff and in the intimate booths—tucked snugly against the walls, dimmed lights hanging over them to create the mood. 

Most of us can't visit this legendary restaurant, but what we can do is duplicate their famous meat sauce in our own kitchen.

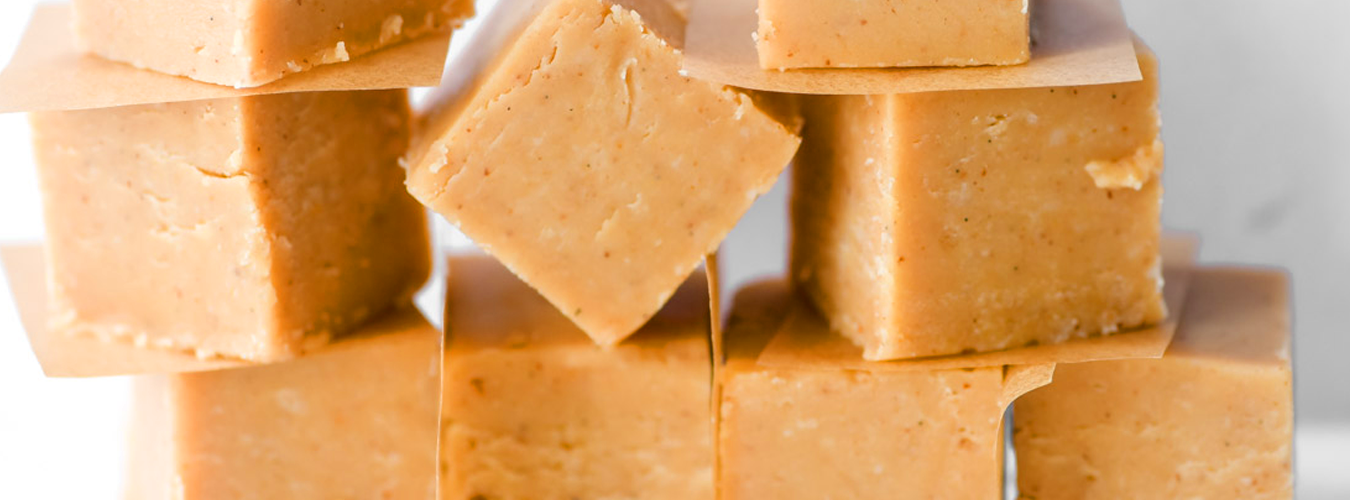
The Best Peanut Butter Fudge I Ever Ate...

by 👩‍🍳 Cooking With a Southern Vibe in Music City USA 👩‍🍳, February 06, 2022


I made this recipe for Christmas 2021 and it was so good that I can't make it again.  Seriously, I have no willpower, ZERO willpower, I could eat the entire batch in a day, yes, it's that good!

I've struggled forever, trying to find the perfect peanut butter fudge recipe, and The View From Great Island, a wonderful blog site that I visit often, nailed it.  It's just perfection, don't change a thing, this will be your forever peanut fudge recipe, I promise it will.

Ingredients

1 cup unsalted butter (2 sticks)
1 cup creamy peanut butter, I use Jif. Note: I do not recommend using 'natural' peanut butter.
1 tsp vanilla extract
1/4 tsp salt
1 lb confectioner's sugar, about 3 1/2 cups

Directions

Line an 8×8 baking pan with parchment paper or foil. Note: you can use a 9×9 pan, or even a loaf pan.

Using a heavy bottomed saucepan melt the butter and peanut butter together over medium heat. Stir constantly to get the mixture well combined.

Turn the heat down to low and stir in the vanilla and salt.

Fold in the sugar with a silicone spatula or spoon. Make sure to get all the sugar incorporated and the fudge nice and smooth. The low heat will help this process.

When the fudge is smooth transfer to your prepared pan and spread out evenly with an offset spatula.

Let chill for at least 2 hours before slicing into small squares. If you have lined your pan with parchment paper or foil you can gently lift it out for neater slicing.

Fudge can be stored at room temperature, or in the refrigerator. It also freezes well.


#peanutbutter #chocolate #healthyfood #food #breakfast #foodie #healthy #foodporn #yummy  #delicious #homemade #peanutbutterlover #cookies #peanut #banana #foodphotography #protein #dessert #instafood #peanuts #glutenfree #nutbutter #fudge #peanutbutterfudge #candy


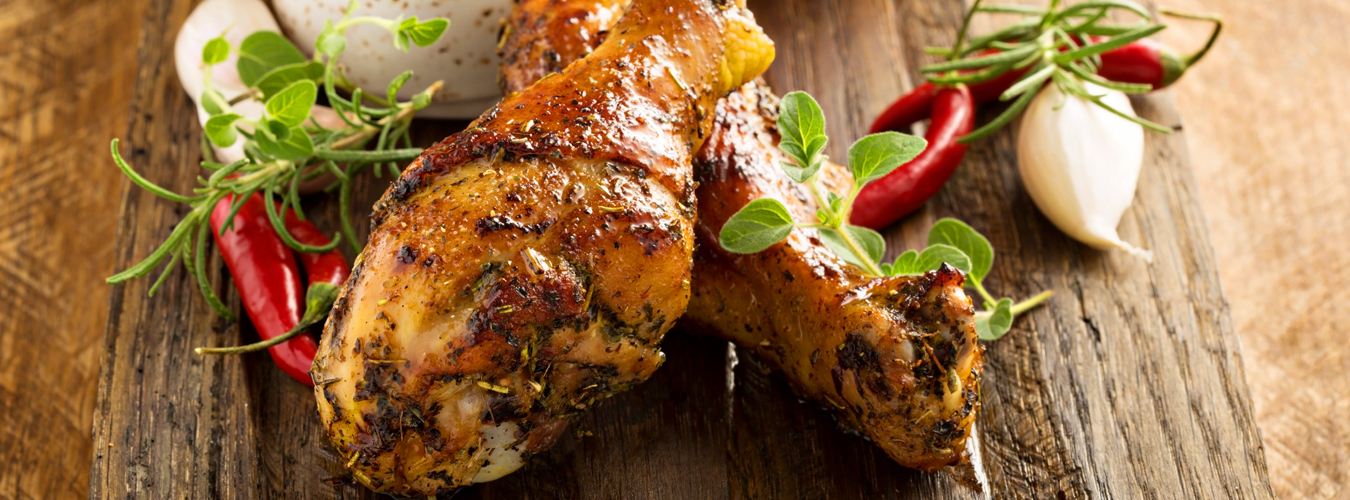
Damn Good Air Fryer Chicken Legs

by 👩‍🍳 Cooking With a Southern Vibe in Music City USA 👩‍🍳, February 06, 2022

Fried chicken legs without the guilt?  Bring it on...

I make these often and they're seriously yummy, easy to prepare with ingredients you have in your kitchen, well, maybe you don't have smoked paprika, it's good stuff, just put it on your grocery list 😀 

  • 6 chicken legs
  • 3 tbs brown sugar
  • 1.5 tsp kosher salt
  • 1 tsp ground black pepper - I love McCormick's Smokehouse Black Pepper for this recipe, well I love this Smokehouse Pepper for a lot of recipes...
  • 1 tsp ground mustard
  • 1 tsp onion powder*
  • 1 tsp garlic powder*
  • 1 tsp smoked paprika
  • ¼ tsp cayenne pepper
  • 1 tbs vegetable oil
Steps
  1. Add all dry ingredients to a large zip top bag and shake to mix well. Add chicken to bag with vegetable oil and shake until all the chicken in coated.
  2. Let chicken marinate in refrigerator for at least 1 hour. The longer the better. Overnight is best!
  3. Preheat air fryer for 5 minutes at 380 degrees (F). Add chicken to air fryer and use “air fry” setting at 380 degrees (F) for 18-20 minutes, turning chicken halfway through. Internal temperature of chicken should be at least 165 degrees (

    I'm a huge fan of Spice Way Onion and Garlic Granules.  They are a large package, 8 oz.,  I transfer to a pint Ball jar to use.  The flavor is amazing, so much better than the jars you buy in the store.  I linked them above when listing the ingredients.

#friedchicken #chicken #foodie #food  #instafood #foodstagram #foodphotography #yummy #chickenlegs #delicious #foodlover #foodbloggerr #sundaydinner #foodies #airfryer

Pioneer Woman's Favorite Recipe

by 👩‍🍳 Cooking With a Southern Vibe in Music City USA 👩‍🍳, February 06, 2022


I've been making Texas Sheet Cake since the 70's when my mother gave me the recipe because all of her friends were making it and raving about it.  Well, our family loved it too and even now, it's our favorite, and one of the easiest cakes to make, no mixer required.

When Pioneer Woman started talking about it, I was just shaking my head, thinking, umhmmmm, I know all about this, I could recite the recipe by heart.  So naturally I had to compare her recipe with mine, and here's how it stacks up. 

  • Bake in a 9x13 pan, because we like thick cake, not thin.  It takes it 30-35 minutes to bake
  • Use a whisk to combine ingredients, easier than stirring and does a thorough job
  • The more chocolate the better,  so I increased the cocoa to 6 tablespoons in the cake
  • I used 1/2 teaspoon of salt
  • I also add more pecans, a lot more to the frosting, at least a cup.  If you're going to make this, make it over the top delicious by being generous with your nuts. 
  • Use an entire box of sifted powdered sugar 
  • Decrease the vanilla to 1 teaspoon
  • Add 1 cup of coconut to the frosting
Her recipe is below, the tweaks above is how I've made it forever.

Here's my original detailed recipe that I posted to this site several years ago

CAKE

2 cups flour
2 cups sugar
1/4 teaspoon salt
2 sticks butter
4 heaping tablespoons cocoa
1 cup boiling water
1/2 cup buttermilk
2 eggs, beaten
1 teaspoon baking soda
2 teaspoons vanilla

FROSTING

1 3/4 sticks butter
1/2 cup pecans finely chopped, optional
6 tablespoons milk
4 tablespoons cocoa
1 teaspoon vanilla
1 pound minus 1/2 cup powdered sugar

DIRECTIONS

Cake:

Combine the flour, sugar and salt in a mixing bowl.

In a saucepan, melt the butter and 4 heaping tablespoons cocoa. Stir together.

Add 1 cup boiling water, allow mixture to boil for 30 seconds, then turn off heat. Pour over flour mixture, and stir lightly to cool.

In measuring cup, combine the buttermilk, beaten eggs, baking soda and vanilla.

Stir the buttermilk mixture into butter/chocolate mixture.

Pour into sheet cake pan and bake at 350°F for 18 to 20 minutes.

Frosting:

While the cake is baking, melt the butter, then stir in cocoa powder, milk, vanilla, powdered sugar and pecans (if using).

Pour over warm cake.


Ina Garten's Most Famous Recipe, Beatty's Chocolate Cake

by 👩‍🍳 Cooking With a Southern Vibe in Music City USA 👩‍🍳, February 05, 2022


If there is one cake that you should make in your lifetime, this is it!  Ina Garten's famous Beatty's Chocolate Cake dates back to 2006.  It's worth the trouble, the flavors are amazing, the hint of mocha just take it over the top.  It’s very moist without being dense or heavy, and has just the right balance of sweetness with rich chocolate flavor. I can see why this is a beloved recipe, 

What a great cake to make for a special occasion, a birthday, a holiday or just because you want to bake something amazing...

  • 1¾ cups all-purpose flour
  • 2 cups sugar
  • ¾ cups good cocoa powder, such as Valrhona
  • 2 teaspoons baking soda
  • 1 teaspoon baking powder
  • 1 teaspoon kosher salt
  • 1 cup buttermilk, shaken
  • ½ cup vegetable oil
  • 2 extra-large eggs, at room temperature
  • 1 teaspoon pure vanilla extract
  • 1 cup freshly brewed hot coffee
  • Chocolate Buttercream Frosting (recipe follows)

Preheat the oven to 350 degrees. Butter two 8-inch round cake pans (for cupcakes, see note). Line with parchment paper, then butter and flour the pans.

Sift the flour, sugar, cocoa, baking soda, baking powder, and salt into the bowl of an electric mixer fitted with the paddle attachment and mix on low speed until combined. In another bowl, combine the buttermilk, oil, eggs, and vanilla. With the mixer on low speed, slowly add the wet ingredients to the dry ones. With mixer still on low, add the coffee and stir just to combine, scraping the bottom of the bowl with a rubber spatula. Pour the batter evenly into the prepared pans and bake for 35 to 40 minutes, until a cake tester comes out clean. Cool in the pans for 30 minutes, then turn them out onto a cooling rack and cool completely. (Not to worry; the top will sink a little in the center.)

Place one layer, flat side up, on a flat plate or cake pedestal. With a knife or offset spatula, spread a thin layer of buttercream on the top only. Place the second layer on top, flat side up, and spread the frosting evenly first on the sides and then on the top of the cake. Cut in wedges and serve at room temperature.

Note: For cupcakes, reduce bake time to 25-30 minutes.

Chocolate Buttercream Frosting (frosts one cake, or 12 cupcakes)

  • 6 ounces good semisweet chocolate, such as Valrhona (see note)
  • ½ pound (2 sticks) unsalted butter, at room temperature
  • 1 extra-large egg yolk, at room temperature
  • 1 teaspoon pure vanilla extract
  • 1¼ cups sifted confectioners’ sugar
  • 1 tablespoon instant coffee granules, such as Nescafe

Chop the chocolate and place it in a heatproof bowl over a pan over simmering water. Stir until justmelted and set aside until cooled to room temperature.

Beat the butter in the bowl of an electric mixer fitted with the paddle attachment on medium-high speed until light yellow and fluffy, about 3 minutes. Add the egg yolk and vanilla and continue beating for 3 minutes. Turn the mixer to low, gradually add the confectioners’ sugar, then beat at medium speed, scraping down the bowl as necessary, until smooth and creamy. Dissolve the coffee in 2 teaspoons of the hottest tap water. On low speed, add the chocolate and coffee to the butter mixture and mix until blended. Don’t whip! Spread immediately on the cooled cake.

Note: I use Valrhona Le Noir 56% Cacao Semisweet Chocolate. You can use also use a good bittersweet chocolate but don’t use chocolate chips because they have stabilizers in them.

If you love the pink cake stand used for the original picture of the cake, I found it for you on Etsy, it's from Mossler Glass and it's called The Large Thistle Cake Plate.   Here's the link, it's not an affiliated link, I just thought it was so pretty I wanted to share.  

Here's the click...

Recipe reprinted from Ina Garten's Website
Copyright 2006, Barefoot Contessa at Home by Ina Garten, Clarkson Potter/Publishers, All Rights Reserved

#chocolatecake #cake #chocolate #birthdaycake #cakesofinstagram #cakes #cakedecorating #dessert #homemade #cakestagram #cakedesign #foodporn #yummy #food #baking #cupcakes #foodie #birthday #cakeart #instacake #homebaker #instafood #delicious #chocolatelover #love #bakery #foodphotography #sweet #cakelover #inagarten #barefootcontessa #foodnetwork #marthastewart #food #foodie #homemade #imsomartha #foodphotography #inagartenrecipe #foodstagram #foodandwine #homecook

Katharine Hepburn Brownies

by 👩‍🍳 Cooking With a Southern Vibe in Music City USA 👩‍🍳, February 05, 2022


Some recipes are just perfection, and this brownie recipe from Katherine Hepburn, first published in  the August edition of Better Homes and Gardens is perfection...

Since then it has been consistently a favorite of food editors, bloggers, cooks and kids, too, because it is so simple to make.


But first, a little trivia about the great lady herself, often imitated but never duplicated, Katherine Hepburn...


Fact 1

Katharine Hepburn was born on May 12, 1907 in Hartford, Connecticut.

Fact 2
Katharine loved to play tennis and golf and was also an amateur artist. Some of her oil paintings were auctioned off in 2004.

Fact 3
Headstrong and spirited, Hepburn refused to conform to society’s expectations of women and she did whatever she thought was right.


Fact 4

This talented performer has won four academy awards for best actress in a film. Her first award was for her role in Morning Glory in 1933. It would take another 34 years before she would win another Academy award. The other movies for which she won Oscar awards as best actress were “Guess Who’s Coming To Dinner”, “On Golden Pond” and “The Lion In Winter”.


Fact 5

Katharine Hepburn starred in her final film role in 1994 in the movie Love Affair.


Fact 6

Katharine Hepburn and Spencer Tracy were long time companions. Hepburn and Tracy starred together in many films throughout her career.


Fact 7

In 1932 this performer was paid $1,500 a week for her appearances on Broadway. At this time this sum of money was unheard of for young actresses.


Fact 8

She was a natural redhed and as a child, Katharine cut her hair off, wore boys’ clothes and made people call her Jimmy.


Fact 9

She was 96 years old when she died on June 29, 2003. She died at her old family home in Connecticut. She was buried in her family plot at the Cedar Hill Cemetery in Hartford.


Fact 10

Before her demise she requested to be buried with no memorial service. Her wishes were upheld but to honor her long time film career and the impact she had on films, the lights of Broadway were dimmed for one minute during her burial service.


And now for that famous brownie recipe....


Ingredients


* 1/2 cup unsweetened cocoa

* 1 stick butter

* 2 eggs

* 1 cup granulated sugar

* 1/4 cup all-purpose flour

* 1 cup broken up walnut or pecan pieces (for better flavor, toast the nuts at 350 F for about 5 minutes)

* 1 teaspoon vanilla extract

* Pinch salt


Preparation


* Preheat oven to 325F.

* Grease an 8-inch-square pan. (Line it with aluminum foil, overhanging on all sides.)  I used parchment paper instead of foil to make a saddle, spraying both the pan and the parchment paper with cooking spray so they won't stick.

* Melt butter in a saucepan with cocoa and stir until smooth.

* Remove from heat and let cool for a few minutes.

* Whisk in eggs, one at a time.

* Stir in vanilla.

* In a separate bowl, combine sugar, flour, nuts and salt.

* Add to the cocoa-butter mixture. Stir until just combined.

* Pour into prepared pan and bake 30-40 minutes. (Do not overbake: Center should still be a little gooey.)

* Let cool completely before cutting into squares. If foil lining is used, lift from pan and cut into 16 squares on a cutting board.


Don't make this in a 9" pan, the brownies will be too thin, and if you bake in a loaf pan, they will be too thick.  You really do need an 8" pan for these.  If you don't have one, Nordic Ware makes a really nice commercial one, their quality is always excellent.  


If you have any interest,  here's a link to Amazon for you.


Paw-Paw Garrett's Famous Homemade Whiskey Cough Syrup

by 👩‍🍳 Cooking With a Southern Vibe in Music City USA 👩‍🍳, February 04, 2022

Whether you have a chronic cough, flu, sinus congestion or Covid, whatever cough you have, this homemade cough syrup will seriously make you feel good. It's all that whiskey and yummy peppermint flavor.  

This is family tested and approved.  A shot before bedtime and you will quit coughing and sleep like a baby.

Fill a small mason jar with broken peppermint candy, you can use a food processor, blender or a rolling pin to beat candy into submission.

-Add 1 generous tablespoon of Honey.

-Squeeze 1/2 lemon over the peppermint candy

-Pour Bourbon over ingredients until jar is full.  Paw-Paw recommends  Wild Turkey Bourbon (101 proof) but any whiskey will work...

-Screw on Lid.

-Wait until fully dissolved (you can shake jar occasionally to help dissolve faster).  If it doesn't dissolve fully, just strain it and pour it back into the pint jar...

-Fill a shot glass with the concoction and drink until that cough goes away...

.

.

.

#coughsyrup #coughremedy #covid #whisky #bourbon #scotch #whiskeygram #cocktails #singlemalt #whiskylover #whiskygram #whiskeylover #drinks #bourbonwhiskey #vodka #beer #bar #whiskyporn #wildturkey #alcohol #scotchwhisky #rum #wine #cheers #whiskeyporn #drink #cocktail


Overnight Steel Cut Oatmeal

by 👩‍🍳 Cooking With a Southern Vibe in Music City USA 👩‍🍳, February 04, 2022


This is the easiest oatmeal, EVER!   Steel cut oatmeal is a pain to make, it takes forever, sticks easily and who needs that hassle in the morning.

I did a little research and found that you can do this overnight in the slow cooker, but there is a trick.  You don't just put it in the crock, it sticks, the edges brown, it dries out easily.  So this is what works for me...

The Basic Recipe:

1 cup steel cut oats
4 cups water
Dash of salt

Put an inner bowl inside your slow cooker.  Don't just sit in the bottom, take a couple of Ball metal rings, or a few balls of aluminum foil to boost it up so that your inner container isn't sitting on the bottom of the slow cooker.  The reason for this is to prevent the bottom of the oatmeal from browning because it has direct contact with the heat source.   

Pour your oatmeal, water and salt in the inner bowl, place it in the slow cooker and then pour water in the outer bowl.  Fill the slow cooker about half full of water.  Then before you go to bed, set it to cook for 8 hours on low, put on your jammies and go to bed.

How easy is that 😀  I turn mine on at 10pm, and by 6am I have perfect oatmeal.  My slow cooker switches to warm after 8 hours and it's ready to eat when we get up.  The only thing I have to do is add cinnamon, toppings, a splash of cream and brown sugar and breakfast is ready.  I refrigerate the leftovers for another morning...
.
.
.


© Jan CAN Cook · THEME BY WATDESIGNEXPRESS